Installation steps may vary according to your product, installation environment, operating system, and other factors. In general terms, you prepare your system, choose installation options, install the product, and launch it. Check your product documentation for product-specific installation help, if provided.
If your team works in a multi-seat stand-alone environment, you can repeat these basic instructions for each computer seat. Alternatively, an administrator can create a deployment, which is described in a separate workflow.
Important: These instructions outline the steps you take to install. They don’t contain troubleshooting information. If you run into problems when you try to install, please contact the Cadspec
technical team.
Software Installation Prerequisites
Before installing, make sure that you’ve prepared your system and gathered all the information you need. We recommend reviewing the Release Notes and check that your system and hardware are compatible with the product you want to install. Most Windows systems and all macOS systems are now 64-bit. To check your Windows system, go to the System control panel.
Permissions
You probably already have Local User Administrative permissions. To verify in Windows, select Control Panel > User Accounts > Manage User Accounts. On macOS, check System Preferences > Users & Groups to verify that you have Admin status.
Install system updates
If you have pending operating system updates please make sure you install them and reboot. Cadspec also recommends temporarily disabling any antivirus programs, because they often interfere with installation.
Serial Number and Product Key
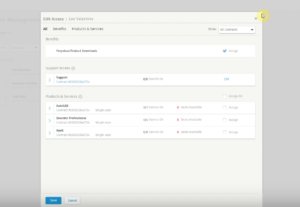
If you have a stand-alone license, activate your software using the serial number and product key in your confirmation email.
Download Software
- Choose a download method (Install Now, Download Now, or Browser Download). If the method you want isn’t listed, it may not be available for your product, operating system, or browser. In Autodesk Account, you can change the default download method.
-
- Install Now. This method, the default for installation from the Autodesk desktop app, is available for Windows only.
Note: Install Now is available only for product versions of 2019 and later.
- Download Now. Autodesk recommends this method for administrators creating a network deployment and single users installing on several computers. This method downloads the installer but doesn’t run it.
- If prompted, choose product details, such as language, version, and operating system.
Most Windows and all macOS operating systems are 64-bit, but you can check your Windows system by going to the System control panel.
-
Choose any supplemental product components.
- If you chose to Install Now or Download Now, respond to the prompts:
- If you chose Download Now, download and install the Autodesk Download Manager (DLM) when prompted. Then use the DLM to download the product.
- Read and accept the license agreement and click Install. If your browser asks what to do with the installation file, select Run.
Configure & Install Software
- Depending on where you are installing from, do one of the following:
- Choose an install method from Autodesk Account or click Install from the Autodesk desktop app (Windows only).
- If prompted, read and accept the license agreement for your country or region.
- Click Install.
- If you see a Product Language drop-down menu, choose the language that the user speaks.
- Accept the default installation path or specify a new one.
- Configure your installation:
- Accept the default configuration by clicking Install. This option preselects the core components to be installed with your product.
- Customize the installation by selecting or deselecting components, adding service packs, and so on. For details about the configuration, see your product documentation. After you select the components, click Install.
- Review the list of installed products and close the installer.
Start your Software
In most cases, license authentication takes place automatically so that you can be up and running right away. However, you may see a Let’s Get Started window that collects information from you to complete license authentication. How to do this:
- Sign in or Single-user. Select this option and sign in with your Autodesk ID to use a license assigned to you
- Network license or Multi-user. Select this option if you use a network server to manage licenses.
- Enter a serial number. If you received a serial number, select this option.
Click What’s my license type? or Help me choose if you’re not sure which license type you have. Alternatively, speak to your Cadspec account manager who will be able to assist with the above.